Creating a cluster using Amazon Web Services (AWS)
AWSCluster is a Cluster implementation that uses
AWS as the cloud service provider.
This tutorial will guide you step by step to create your first AWS-based cluster in flambé.
Setting up your AWS account
Important
If you are already familiar with AWS main concepts (Subnets, type of instances, security groups, etc) and you have your AWS account set up, then feel free to skip this section. Consider that your Account should be able to:
- Have a key pair to access instances.
- Create instances with automatic public IPs.
- Connect through SSH from the outside world.
- Have the security credentials and configuration files locally.
If any of this requirements is not met, please review the following steps.
You will first need to create your AWS account here. Once done, go into the console (https://console.aws.amazon.com). You should see something like:

Attention
AWS provides a free tier. If users use this option, the timeout feature may not be available and only
basic CPU instances are going to be available.
Create key-pair
Important
If you already have a key pair feel free to ignore this section.
A key pair will be used to communicate with the instances.
In order to create a Key Pair, go to the Services -> EC2:

On the left side list, go to Key Pairs:

Create a key pair and notice that a .pem file will be downloaded:

Important
Pick a recognazible name because you will use it later.
Important
Save your .pem file in a safe location as AWS will not give you access again to the file.
Warning
Set the right permissions to the pem file so only the root user can read it:
chmod 400 /path/to/my-pair.pem
Create security credentials
Important
If you already have security credentials, feel free to skip this section.
Security credentials are a way of authentication additionally to user/password information. For more information about this, go here
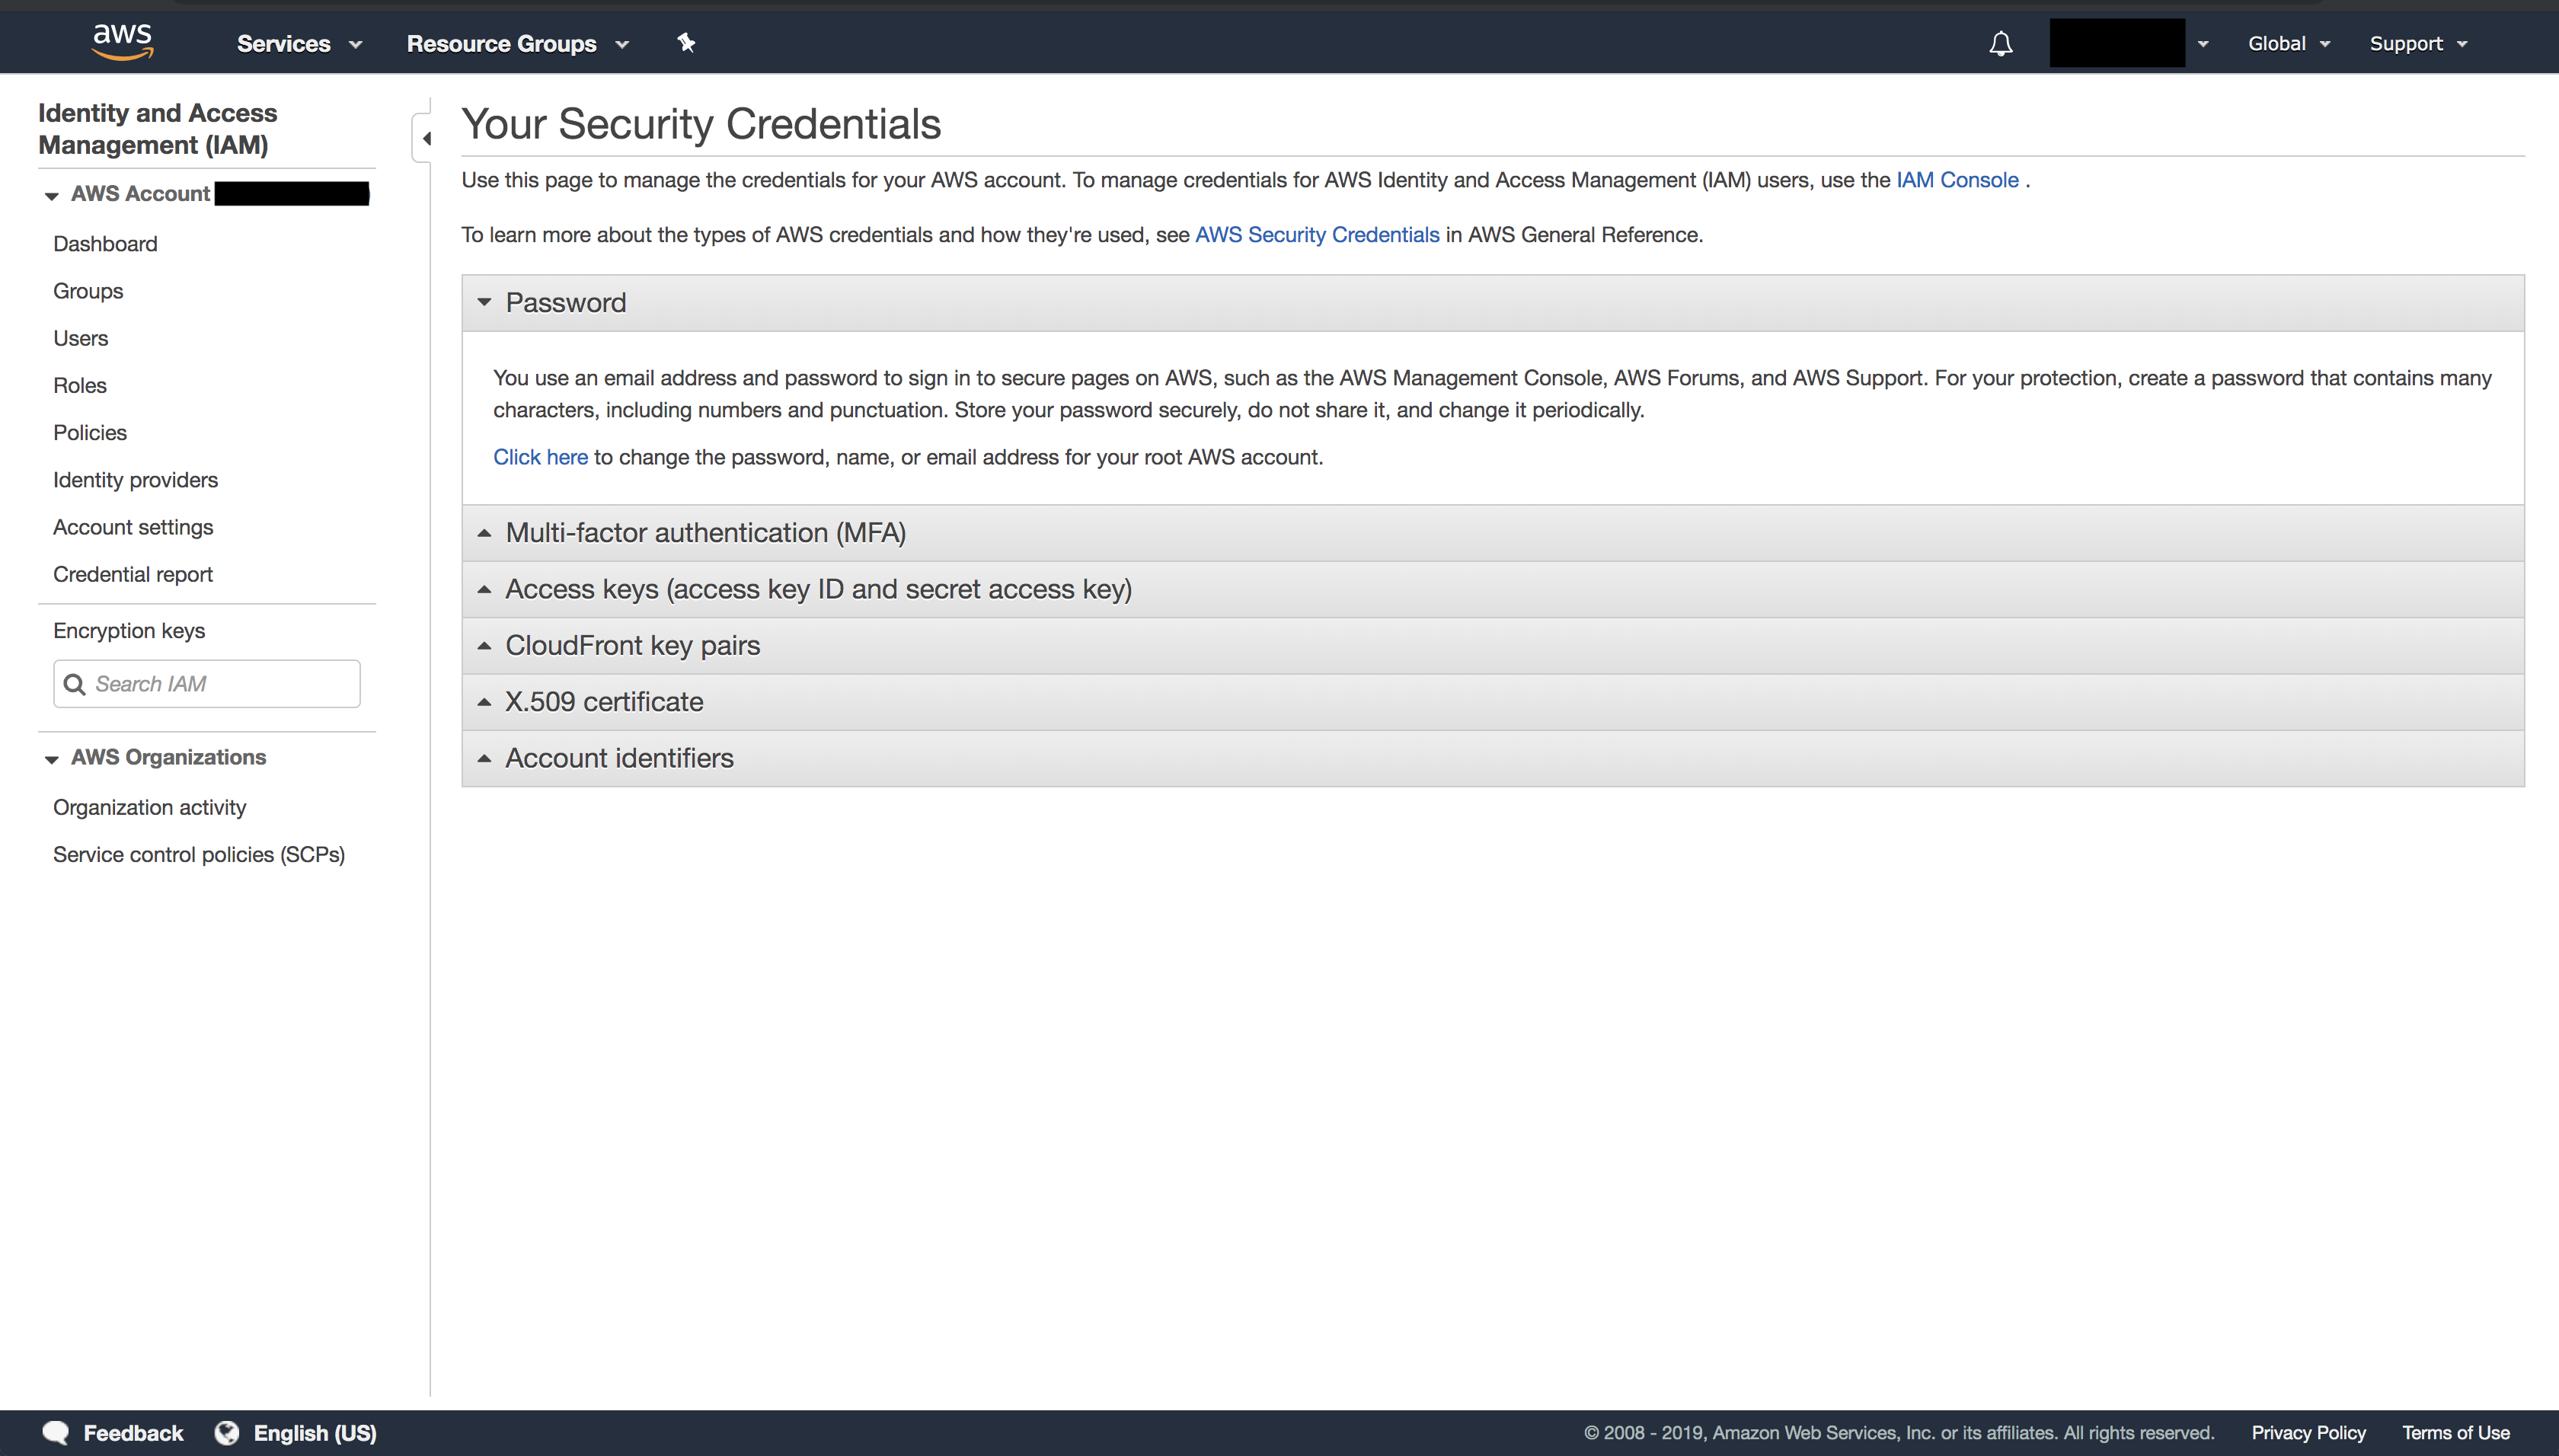
In order to create the Security Credentials, go to the right top section that contains your name. Press on My Security Credentials:
Go to Access Keys and click Create New Access Key.
When creating them, you should see something like:

Important
Download the file and make sure you save it in a safe location. Note that you won’t be able to access this information again from the console.
Basic local configuration
Having access now to your AWS_ACCESS_KEY_ID and AWS_SECRET_ACCESS_KEY, you will need to configure 2 configuration files:
Tip
This is an initial and basic configuration. More information here.
Important
At this point, you should have full access to AWS from your local computer through the Security Credentials. This snippet should run without raising errors:
1 2 3 | import boto3
sess = boto3.Session()
sess.client("ec2").describe_instances() # This may return no content if you have no instances
|
Create VPC and Subnet
You will need to create a VPC and a Subnet where your instances will be running.
Tip
For more information about these topics, go here
1: Create VPC
In order to create a VPC, go to Services -> VPC. On the left side, go to VPC:

Click on Create VPC and choose some values. For example:

2: Create Subnet
In order to create a Subnet, go to Services -> VPC. On the left side, go to Subnet:

Click on Create Subnet and choose some values. Make sure to reference the VPC you just created:


3: Enable auto-assign public IPs
This feature allows AWS to automatically assign public IPs to hosts that are created.
Important
This feature needs to be enabled for flambé.
First, go into your VPC section and select the VPC you created in the first step. select Actions -> Edit DNS Hostnames:
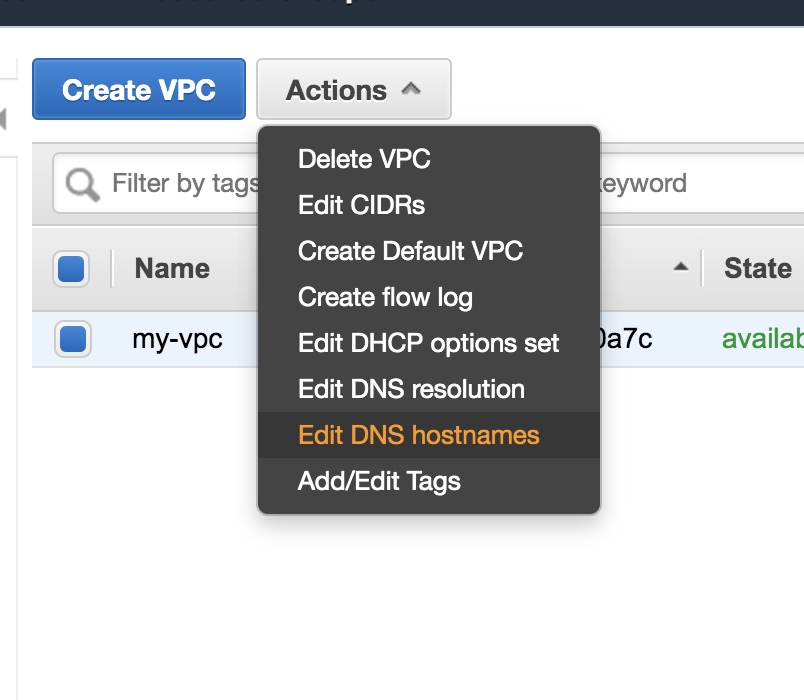
Check on enable and click Save.
After that, go to your Subnet section and select the Subnet you created in step 2. select Actions -> Modify auto-assign IP settings:
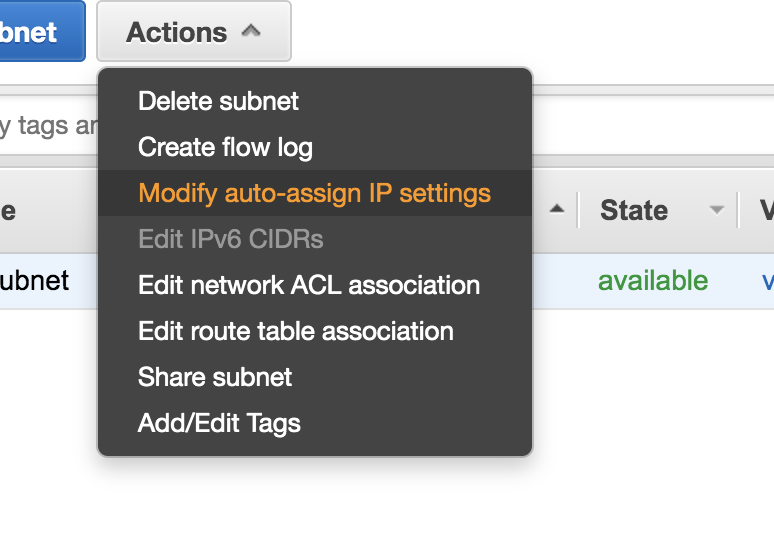

Enable the feature and click Save.
3: Configure Internet Gateways and Routes
Go to Services -> VPC and choose Internet Gateways. Verify that there is an internet gateway attached to your VPC. Otherwise, choose Create Internet Gateway:

After creating the internet gateway, go to Actions -> Attach to VPC. Follow the instructions to attach it to the created VPC:

Finally, go to Subnet section and select your Subnet. On the Route Table tab, verify that there is a route with 0.0.0.0/0
as the destination and the internet gateway for your VPC as the target.
Otherwise, choose the ID of the route table (rtb-xxxxxxxx) to navigate to the Route Table. On the Routes tab, choose Edit routes.
Choose Add route, use 0.0.0.0/0 as the destination and the internet gateway as the target. Choose Save routes.
Create Security Group (SG)
Security groups define security policies for the instaces. For more information go here
In order to create a SG, go to Services -> EC2. Click Security Groups on the left panel and then Create Security Group .
Important
The SG must have at least SSH access using standard port 22.

Tip
The above image shows the SG allows ssh traffic from 0.0.0.0/0 (which means from everywhere). If you are under static
public IP or VPN, you can make more secure rules.
Important
If this cluster will be running remote Experiment, you may also want to open HTTP ports
49556 and 49558 for the Report Site and Tensorboard.
Creating a AWSCluster
At this point you should be ready to create your AWSCluster. You will need:
- The name of the key pair
- The location of the pem file and make sure that it has only reading permissions for root.
- The appropriate Security Group’s ID
- The Subnet ID you wish all instances to live in.
Template:
!AWSCluster

name: my-cluster

factories_num: 2

# Type of machines.
factories_type: t3.small
orchestrator_type: t3.small

# Set timeouts for autmatic shutdown
orchestrator_timeout: -1
factories_timeout: -1

creator: user@company.com  # Pick whatever you want here

# Name of my key pair
key_name: my-pair

# Specify you pem location
key: /path/to/my-pair.pem

# You can add additional tags. This is OPTIONAL.
tags:
    project: my-project
    company: my-company

# Specify the Subnet ID
subnet_id: subnet-XXXXXXXXXXXXXXX

# The amount of GB for each instance.
volume_size: 100

# Specify the SG ID
security_group: sg-XXXXXXXXXXXXXXX
Create the cluster by executing:
flambe aws-cluster.yaml
You should see something like:

If everything is successfull, you should see you instances in your EC2 console:

Reusing a AWSCluster
As long as the cluster name hasn’t change, you can reuse the same cluster. So if after creating a cluster like the previous one you execute again:
flambe aws-cluster.yaml
Then flambé will automatically detect an existing cluster and it will reuse it:

Tip
This is particularly useful when running Experiment objects in the cluster.
While you cannot run multiple experiments in the same cluster simultaneously, you can run them sequentially
without having to set up the cluster again like the following:
flambe experiment.yaml -c my-cluster.yaml
# after experiment is done...
flambe other_experiment.yaml -c my-cluster.yaml